Difference between revisions of "Setup"
(→Messages and Emails) |
Harry.vann (talk | contribs) |
||
| (93 intermediate revisions by 4 users not shown) | |||
| Line 8: | Line 8: | ||
*Toggling visibility of Deactivated groups | *Toggling visibility of Deactivated groups | ||
<br/>'''For the full page on Group Settings, click [[Setup - Groups|here]].''' | <br/>'''For the full page on Group Settings, click [[Setup - Groups|here]].''' | ||
| + | |||
| + | ==Halls== | ||
| + | [[File:Halls Membership.png|thumb|150px|Expire Halls Membership]] | ||
| + | |||
| + | |||
| + | In the Halls section is where you can expire all Hall memberships on a particular date, similar to how you can expire group memberships. | ||
| + | All you need to do is tick the box next to '''Expire all hall memberships on the specified date''', select the date you would like to expire all Hall memberships on and click save. | ||
| + | |||
| + | <br/> | ||
| + | <br/> | ||
| + | <br/> | ||
==[[Registration]]== | ==[[Registration]]== | ||
| Line 27: | Line 38: | ||
<br/><br/> | <br/><br/> | ||
'''For the full page on Questionnaire Settings, click [[Questionnaire|here]].''' | '''For the full page on Questionnaire Settings, click [[Questionnaire|here]].''' | ||
| + | <br/> | ||
| + | <br/> | ||
| + | <br/> | ||
| − | ==[[Setup - Event]]== | + | ==[[Setup - Event|Events]]== |
[[File:Setup - Events.PNG|thumb|200px|Setup Events Screen]] | [[File:Setup - Events.PNG|thumb|200px|Setup Events Screen]] | ||
As an administrator you can use this section to configure Global Settings related to Events on UnionCloud, such as the default max number of tickets a user can purchase.<br/> | As an administrator you can use this section to configure Global Settings related to Events on UnionCloud, such as the default max number of tickets a user can purchase.<br/> | ||
| Line 46: | Line 60: | ||
You can have more than one of each of these, and they can be set for different aspects, for example you could set up a new Sender as Elections@institution.ac.uk which solely sent emails to users who had registering in an election, confirming they had submitted a Nomination. | You can have more than one of each of these, and they can be set for different aspects, for example you could set up a new Sender as Elections@institution.ac.uk which solely sent emails to users who had registering in an election, confirming they had submitted a Nomination. | ||
<br/><br/> | <br/><br/> | ||
| − | '''For the full page on Email | + | '''For the full page on Email Settings, click [[Emails|here]].''' |
==[[Messages|Messages and Emails]]== | ==[[Messages|Messages and Emails]]== | ||
[[File:Setup - Messages and Emails.PNG|thumb|200px|Setup Messages and Emails screen]] | [[File:Setup - Messages and Emails.PNG|thumb|200px|Setup Messages and Emails screen]] | ||
| − | As an administrator you can | + | As an administrator you can use this section to configure three types of content:<br/> |
| − | Firstly you can use it to configure many of the default warnings, information, notifications and help text boxes around the UnionCloud site, so that they are both relevant to your Users, but also written in a tone that matches your Union style.<br/> | + | *Firstly you can use it to configure many of the default warnings, information, notifications and help text boxes around the UnionCloud site, so that they are both relevant to your Users, but also written in a tone that matches your Union style.<br/> |
| − | Secondly you can use it to configure the text of a number of the system generated emails sent out by UnionCloud, such as Group / Ticket Purchase Confirmations, Election Notifications etc. | + | |
| − | Finally, you can also utilize this section to configure which social media plugin you wish to use across the platform, by default we setup [http://www.addthis.com/ AddThis] for you. | + | *Secondly you can use it to configure the text of a number of the system generated emails sent out by UnionCloud, such as Group / Ticket Purchase Confirmations, Election Notifications etc. |
| − | + | ||
| − | '''For the full page on | + | *Finally, you can also utilize this section to configure which social media plugin you wish to use across the platform, by default we setup [http://www.addthis.com/ AddThis] for you. |
| + | |||
| + | '''For the full page on Messages and Emails, click [[Messages|here]].''' | ||
==[[Advertisements]]== | ==[[Advertisements]]== | ||
| + | [[File:Setup - Advertisements.PNG|thumb|200px|The Setup - Advertisements Screen]] | ||
| + | An administrator can use this section to assign preset spaces on the Articles, and Articles Index pages to display 'Advertisements', there are three spaces available, with two different sets of dimensions. These are HTML Spaces, and as such aren't limited to displaying static images. Equally, they don't just have to be advertisements, whatever you put in the space can link through to other relevant or timely content.<br/><br/> | ||
| + | '''For the full page on Advertisements, click [[Advertisements|here]].''' | ||
| + | |||
| + | <br/> | ||
==[[Developers]]== | ==[[Developers]]== | ||
| Line 65: | Line 86: | ||
An administrator can use this section to set new Developers, some of our more advanced users, particularly if you have the skills to do some development work in house will need to use this section when they want to give apps / third parties access to UnionCloud API's on their site.<br/><br/> | An administrator can use this section to set new Developers, some of our more advanced users, particularly if you have the skills to do some development work in house will need to use this section when they want to give apps / third parties access to UnionCloud API's on their site.<br/><br/> | ||
'''For the full page on Profile Updates, click [[Profile Updates|here]].''' | '''For the full page on Profile Updates, click [[Profile Updates|here]].''' | ||
| + | <br/> | ||
| + | <br/> | ||
==[[Profile Updates]]== | ==[[Profile Updates]]== | ||
| + | [[File:Profile Updates.PNG|thumb|200px|The Profile Updates screen]] | ||
| + | |||
| − | |||
An administrator can use this section to set which elements of a profile users are allowed to update or not.<br/><br/> | An administrator can use this section to set which elements of a profile users are allowed to update or not.<br/><br/> | ||
'''For the full page on Profile Updates, click [[Profile Updates|here]].''' | '''For the full page on Profile Updates, click [[Profile Updates|here]].''' | ||
| + | |||
| + | <br/> | ||
| + | <br/> | ||
==[[CMS]]== | ==[[CMS]]== | ||
| + | [[File:CMS Configuration.png|thumb|right|200px| CMS Configuration Page]] | ||
| + | |||
| + | |||
| + | An administrator can use this section to configure various settings related to CMS (Content Management System), which also includes configuring categories for articles and resources/documents which you will upload onto your site. | ||
| + | |||
| + | '''For the full page on CMS set-up, click [[CMS|here]].''' | ||
| + | |||
| + | <br/> | ||
| + | <br/> | ||
==[[Finance]]== | ==[[Finance]]== | ||
| + | [[File:Finance Set-up.png|thumb|right|200px|Finance Set-up Screen]] | ||
| + | |||
| + | As an administrator, you can use this section to set-up several options regarding finance on your site, such as nominal codes, service charge and shipping charge management. However, before making changes in this section we recommend you speak to your finance staff and consult the documentation. | ||
| + | |||
| + | |||
| + | '''For the full page on Finance set-up, click [[Finance|here]].''' | ||
| + | <br/> | ||
| + | <br/> | ||
==[[Nominal Code]]== | ==[[Nominal Code]]== | ||
| + | [[File:Nominal Codes.png|thumb|right|200px|Nominal Codes]] | ||
| − | + | Nominal codes are unique reference numbers which your Finance staff will use for tracking where to allocate funds when downloading a Finance Report. They are useful for auditing and keeping track of your finances. As an administrator you can use this section to manage your nominal codes and create new ones. | |
| − | ==[[Social Media]] | + | '''For the full page on Nominal Codes, click [[Nominal Code|here]].''' |
| + | |||
| + | ==Social Media== | ||
| + | [[File:Social media.png|thumb|200px|Configure Social Media]] | ||
| + | |||
| + | As an administrator you can use this section to tie your organisation's Facebook & Twitter accounts to UnionCloud to simplify sharing of content, such as news articles on social media. All you need to do is click on the '''Subscribe union to existing Facebook page/Twitter''' radio button and you will be prompted to login to your social media account. Social media platform and UnionCloud are now linked. | ||
| + | |||
| + | <br/> | ||
==[[EVoting]]== | ==[[EVoting]]== | ||
| + | [[File:Evoting Setup.png|thumb|right|200px|Evoting Setup]] | ||
| − | + | As an administrator you can use this section to setup some of the default settings for elections. | |
| − | ==Tribes== | + | '''For the full page on eVoting set-up, click [[EVoting|here]].''' |
| − | + | <br/> | |
| + | <br/> | ||
| + | <br/> | ||
| + | <br/> | ||
| + | |||
| + | ==RSS Feeds== | ||
| + | [[File:RSS Feeds.png|thumb|right|RSS Feeds]] | ||
| + | An administrator can use this section to set the default options for whether content from News/Articles should be included in your sites RSS Feed. There are two checkbox options: | ||
| + | |||
| + | *Include all events in the RSS feed by default | ||
| + | *Include all articles in the RSS feed by default | ||
| + | <br/> | ||
| + | <br/> | ||
| + | |||
| + | ==[[Tribes]]== | ||
| + | [[File:Admin - Tribes.png|thumb|right|Admin/Setup/Tribes]] | ||
| + | |||
| + | Group your students in Tribes during the sign-up process for better communications targeting and more. | ||
| + | |||
| + | Using guidance conducted by Redbrick Research, Tribes is a set of groups students will be put into when they first register on your UnionCloud website. | ||
| + | |||
| + | This simply involves the student answering a few Strongly Agree to Strongly Disagree questions (see image above) during registration, then they will be put in one of the following: | ||
| + | |||
| + | * Fun Lovers | ||
| + | * Studious Solos | ||
| + | * Flow Goers | ||
| + | * Leading Lights | ||
| + | * Conscientious Carers | ||
| + | * Party People | ||
| + | |||
| + | Each Tribe will then be set up as a user group which you can use across your UnionCloud site as you would any other group. Particularly useful if you want to send targeted communications to different Tribes. | ||
| + | |||
| + | === Can I create my own Tribes? === | ||
| + | Yes! This is possible in Admin>Setup>Tribes. Check 'Override OneVoice Tribe Rules'. | ||
| + | |||
| + | Then head to 'Tribes Setup' and click 'Add Tribe'. | ||
| + | [[File:Tribes-setup.png|frameless|center]] | ||
| + | As you can see here, you can then give your new Tribe a name, description and setup the rules for that Tribe. | ||
| + | |||
| + | ===== IMPORTANT ===== | ||
| + | Please be aware that setting up the various rules for each tribe takes a fair amount of logic and could take some time for whoever is doing it. Therefore we recommend that unless you have the time, stick to the OneVoice Tribe rules. | ||
| + | |||
| + | <br/> | ||
| + | <br/> | ||
| + | <br/> | ||
==[[Permissions]]== | ==[[Permissions]]== | ||
| + | [[File:Permissions.png|thumb|Admin/setup/Permissions]] | ||
| + | |||
| + | This section allows you to create permission sets which then can be assigned to the user groups. This gives you control over who you would like to have access to areas on the platform. For example, you can create a permission set for group administrators giving them access to only the backend of their club/society page to manage and run their group. When creating a new permission set there are three types which are the following: | ||
| + | |||
| + | '''New Union permission set'''- This option gives accesses to everything on the dashboard, this is usually assigned to staff. | ||
| + | |||
| + | '''New Group permission set'''- This option gives access to the group page of the dashboard, so group admins can manage their club/society. | ||
| + | |||
| + | '''New Event permission set'''- This option gives access to managing the events side of things where you can assign a permission set to a user/ | ||
| + | admin to update upcoming events. | ||
| − | ==[[ | + | Once you have selected a type you will see a number of checkboxes allowing you to select what you want users to have access to in that permission type. |
| + | |||
| + | click here for more on [http://support.unioncloud.org/UnionCloud/wiki/index.php?title=Permissions Permission set's] | ||
| + | |||
| + | ==Reports== | ||
| + | [[File:Configure Reports.png|thumb|200px|Configure Reports]] | ||
| + | |||
| + | |||
| + | This section allows you to set a minimum threshold, for number of users, for the demographic reports which you can download throughout the system. All you need to do to set this is enter your required number into the textbox and click save. | ||
| + | |||
| + | <br/> | ||
| + | <br/> | ||
| + | <br/> | ||
| + | <br/> | ||
| + | |||
| + | ==Programmes== | ||
[[File:US2706.PNG|thumb|200px|Setting Restriction for Single or Multiple programme memberships]] | [[File:US2706.PNG|thumb|200px|Setting Restriction for Single or Multiple programme memberships]] | ||
===Multiple Programme Management=== | ===Multiple Programme Management=== | ||
| Line 98: | Line 220: | ||
This caused problems as not all institutions sent data to expire users. As a solution we have added an option to Setup which allows Unions to restrict program membership to one program per user, meaning if this option is selected and a user is uploaded with a new programme membership, it will auto expire their previous one and replace it with this one. It can be found at <br/> | This caused problems as not all institutions sent data to expire users. As a solution we have added an option to Setup which allows Unions to restrict program membership to one program per user, meaning if this option is selected and a user is uploaded with a new programme membership, it will auto expire their previous one and replace it with this one. It can be found at <br/> | ||
{{url|/administrator/unions/programmes_configuration}}<br/> Or Dashboard >> Admin >> Setup >> Programmes | {{url|/administrator/unions/programmes_configuration}}<br/> Or Dashboard >> Admin >> Setup >> Programmes | ||
| + | |||
| + | ==Alumni== | ||
| + | [[File:Configure Alumni.png|thumb|200px|Configure Alumni]] | ||
| + | |||
| + | |||
| + | This section allows you to set the number of days the system will keep alumni data before it removes personal details for GDPR. All you need to do it enter your number of days into the textbox and click save. Alumni data will now be automatically deleted after the set amount of days has been reached. | ||
Latest revision as of 09:26, 11 November 2019
Due to the depth that each of these sections can cover, and the fact that some of these have sub-pages even further still, we will use this screen only to provide a summary of what each one is for, and by clicking the heading you will be taken to a page with content specific to each setup item.
Contents
Setup - Groups
This section contains all of the Settings for Groups within UnionCloud, it includes but is not limited to;
- Updated Group Types
- Updating Group Categories
- Setting Global Membership Expiry Dates
- Toggling visibility of Deactivated groups
For the full page on Group Settings, click here.
Halls
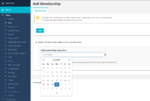
In the Halls section is where you can expire all Hall memberships on a particular date, similar to how you can expire group memberships.
All you need to do is tick the box next to Expire all hall memberships on the specified date, select the date you would like to expire all Hall memberships on and click save.
Registration
As an administrator you can use this section to set a number of options related to users registration on your UnionCloud site.
- Accepted Emails
- University ID Setup
- Registration and Access
- Library Card Regex
- Support Details
For the full page on Registration Settings, click here.
Questionnaire
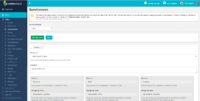
As an administrator you can use this section to configure the questions you ask students at the point of registration, many unions will use this section to set up demographic surveys, or to gather extra information about students which they can use to target them.
For the full page on Questionnaire Settings, click here.
Events
As an administrator you can use this section to configure Global Settings related to Events on UnionCloud, such as the default max number of tickets a user can purchase.
It's broken down into two sections;
- Events
- Event Types
For the full page on Event Settings, click here.
Emails
As an administrator you can will use this section to configure the Email Address' to be used by UnionCloud.
These are broken down into to distinct categories;
- Sender Emails - Email addresses you wish to send Campaigns / Automated emails from
- Receiver Emails - Email addresses you wish to have automated messages sent to when certain triggers occur.
You can have more than one of each of these, and they can be set for different aspects, for example you could set up a new Sender as Elections@institution.ac.uk which solely sent emails to users who had registering in an election, confirming they had submitted a Nomination.
For the full page on Email Settings, click here.
Messages and Emails
As an administrator you can use this section to configure three types of content:
- Firstly you can use it to configure many of the default warnings, information, notifications and help text boxes around the UnionCloud site, so that they are both relevant to your Users, but also written in a tone that matches your Union style.
- Secondly you can use it to configure the text of a number of the system generated emails sent out by UnionCloud, such as Group / Ticket Purchase Confirmations, Election Notifications etc.
- Finally, you can also utilize this section to configure which social media plugin you wish to use across the platform, by default we setup AddThis for you.
For the full page on Messages and Emails, click here.
Advertisements
An administrator can use this section to assign preset spaces on the Articles, and Articles Index pages to display 'Advertisements', there are three spaces available, with two different sets of dimensions. These are HTML Spaces, and as such aren't limited to displaying static images. Equally, they don't just have to be advertisements, whatever you put in the space can link through to other relevant or timely content.
For the full page on Advertisements, click here.
Developers
An administrator can use this section to set new Developers, some of our more advanced users, particularly if you have the skills to do some development work in house will need to use this section when they want to give apps / third parties access to UnionCloud API's on their site.
For the full page on Profile Updates, click here.
Profile Updates
An administrator can use this section to set which elements of a profile users are allowed to update or not.
For the full page on Profile Updates, click here.
CMS
An administrator can use this section to configure various settings related to CMS (Content Management System), which also includes configuring categories for articles and resources/documents which you will upload onto your site.
For the full page on CMS set-up, click here.
Finance
As an administrator, you can use this section to set-up several options regarding finance on your site, such as nominal codes, service charge and shipping charge management. However, before making changes in this section we recommend you speak to your finance staff and consult the documentation.
For the full page on Finance set-up, click here.
Nominal Code
Nominal codes are unique reference numbers which your Finance staff will use for tracking where to allocate funds when downloading a Finance Report. They are useful for auditing and keeping track of your finances. As an administrator you can use this section to manage your nominal codes and create new ones.
For the full page on Nominal Codes, click here.
Social Media
As an administrator you can use this section to tie your organisation's Facebook & Twitter accounts to UnionCloud to simplify sharing of content, such as news articles on social media. All you need to do is click on the Subscribe union to existing Facebook page/Twitter radio button and you will be prompted to login to your social media account. Social media platform and UnionCloud are now linked.
EVoting
As an administrator you can use this section to setup some of the default settings for elections.
For the full page on eVoting set-up, click here.
RSS Feeds
An administrator can use this section to set the default options for whether content from News/Articles should be included in your sites RSS Feed. There are two checkbox options:
- Include all events in the RSS feed by default
- Include all articles in the RSS feed by default
Tribes
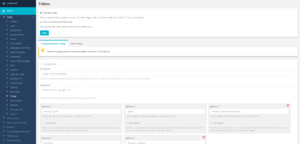
Group your students in Tribes during the sign-up process for better communications targeting and more.
Using guidance conducted by Redbrick Research, Tribes is a set of groups students will be put into when they first register on your UnionCloud website.
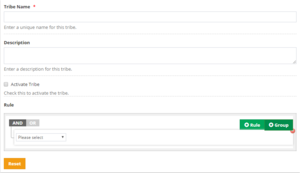
This simply involves the student answering a few Strongly Agree to Strongly Disagree questions (see image above) during registration, then they will be put in one of the following:
- Fun Lovers
- Studious Solos
- Flow Goers
- Leading Lights
- Conscientious Carers
- Party People
Each Tribe will then be set up as a user group which you can use across your UnionCloud site as you would any other group. Particularly useful if you want to send targeted communications to different Tribes.
Can I create my own Tribes?
Yes! This is possible in Admin>Setup>Tribes. Check 'Override OneVoice Tribe Rules'.
Then head to 'Tribes Setup' and click 'Add Tribe'.
As you can see here, you can then give your new Tribe a name, description and setup the rules for that Tribe.
IMPORTANT
Please be aware that setting up the various rules for each tribe takes a fair amount of logic and could take some time for whoever is doing it. Therefore we recommend that unless you have the time, stick to the OneVoice Tribe rules.
Permissions
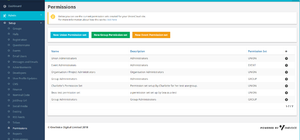
This section allows you to create permission sets which then can be assigned to the user groups. This gives you control over who you would like to have access to areas on the platform. For example, you can create a permission set for group administrators giving them access to only the backend of their club/society page to manage and run their group. When creating a new permission set there are three types which are the following:
New Union permission set- This option gives accesses to everything on the dashboard, this is usually assigned to staff.
New Group permission set- This option gives access to the group page of the dashboard, so group admins can manage their club/society.
New Event permission set- This option gives access to managing the events side of things where you can assign a permission set to a user/ admin to update upcoming events.
Once you have selected a type you will see a number of checkboxes allowing you to select what you want users to have access to in that permission type.
click here for more on Permission set's
Reports
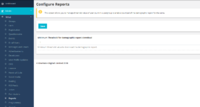
This section allows you to set a minimum threshold, for number of users, for the demographic reports which you can download throughout the system. All you need to do to set this is enter your required number into the textbox and click save.
Programmes
Multiple Programme Management
Previously a user was by default able to store multiple programme memberships, UnionCloud was designed this way to cater to Universities where students Study Joint Honors and are added to multiple programme codes, and also to cater to colleges where a user is likely to have multiple different courses. An outcome of this was that if an institution sent an updated Student upload file, which included a new Course, say for example a student has changed course, it doesn't instinctively remove the user from the previous course. If an institution wished to end a users programme membership, they needed to update to expire it.
This caused problems as not all institutions sent data to expire users. As a solution we have added an option to Setup which allows Unions to restrict program membership to one program per user, meaning if this option is selected and a user is uploaded with a new programme membership, it will auto expire their previous one and replace it with this one. It can be found at
You can find this page on your own site at url: <yoursite>/administrator/unions/programmes_configuration
Or Dashboard >> Admin >> Setup >> Programmes
Alumni
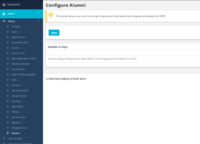
This section allows you to set the number of days the system will keep alumni data before it removes personal details for GDPR. All you need to do it enter your number of days into the textbox and click save. Alumni data will now be automatically deleted after the set amount of days has been reached.
