Tribes
This section allows you to set-up and configure your student Tribes. Tribes is a way of categorising and grouping students based on their answers to specific questions, which they will be asked when they register on your UnionCloud site. You can use the standard system questions and tribes or you can create your own questions and configure rules to sort your students into your bespoke tribes.
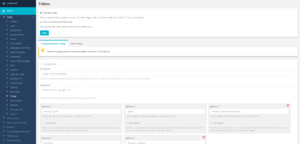
As standard, the Tribes functionality will be turned off on your site. To activate Tribes simply tick the relevant checkbox, as seen in the screenshot to the right, and press save. This will make Tribes live on your site with the standard OneVoice questions and tribes configuration. Please note, if you would like to create your own unique tribes DO NOT active tribes until you have finished setting-up your questions, rules and tribes. More details on how to do this are below in the Creating Bespoke Tribes section.
Using OneVoice Standard Tribes
You can get started straight away with Tribes by using the default tribing questions which are already configured in your system. To do this, all you need to do is tick the Activate Tribes box and nothing else.
Tribing Questions Setup
In this section, you will see that all the questions and answers are blocked out and uneditable, as you are using the default settings and these cannot be edited or changed in any way. The standard questions/phrases are:
- I like to have a big night out.
- Achieving things that will benefit others gives me more satisfaction than anything else.
- I know exactly who I am and what I can achieve.
- I often feel excluded by the culture followed by this university.
- I am easily influenced by others.
- I like to take initiatives in these activities.
All of these questions can be answered by selecting the option: Strongly agree, Agree, Neither agree nor disagree, Disagree or Strongly disagree from the single select dropdown. The only exception is the last question which is a mulit-select tickbox, with the options: Sports, Events, Volunteering and Democracy.
Tribes Setup
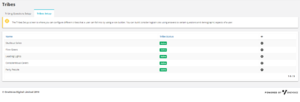
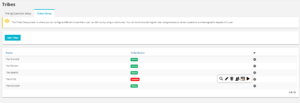
Clicking on the Tribes Setup tab next to Tribing Questions Setup will bring up the page to the right. This is a list of all the default tribes which students will be placed into by answering the questions above. Similarly to the questions, these are also uneditable. The standard tribes are:
- Studious Solos
- Flow Goers
- Leading Lights
- Conscientious Carers
- Party People
Clicking on the ![]() icon next to a Tribe will give you the option to Show Tribe, Show Tribe Members and Download Member Details.
icon next to a Tribe will give you the option to Show Tribe, Show Tribe Members and Download Member Details.
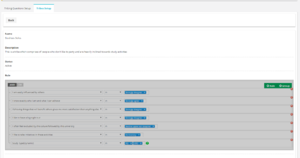
- Show Tribe - This is essentially the Tribe summary page, with the completed fields of Name, Description, Status and Rule (an example of this can be seen to the right).
- Show Tribe Members - This will present you with a list of all students in that particular Tribe group, with the fields of University ID, Forename, Surname, Birth Date and Email. If you would like more in-depth details, you can click the blue Generate Report button at the top of the page to download a CSV file of all members' details.
- Download Member Details - Clicking on this icon will automatically download a CSV file of Tribe member details to your device, without having to navigate away from the Tribes page.
Creating Bespoke Tribes
To create your own questions and Tribes tick the checkbox next to Override OneVoice Tribe Rules and click Save. This will refresh the page and bring up a screen similar to Questionnaire.
Tribing Questions Setup
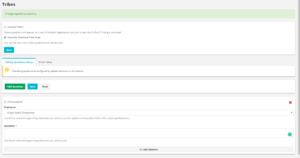
You will recognise this functionality from the Questionnaire section, which is very similar. On this page, which is shown to the right, you can add new questions by clicking on the green Add Question button. On a question tile you can do a number of things.
- Toggle the Hide Question checkbox to choose if you want this particular question to be visible to students.
- Display as - choose if you want your answers to be displayed as either a Single Select Dropdown or Multi-Select Tickbox.
- Question - Enter your actual question/phrase which you want students to answer or comment on.
- Add Options - Click the grey bar at the bottom to add answer options to your question. Click the red X on an option to delete it, for example, if you add too many.
- For each option you will need to add a label in the blank textbox, for example, agree/disagree or yes/no.
- Toggle the Hide Option checkbox to choose if you want this particular option to be visible to students. Options cannot be deleted once in use because they will be linked to active data, but use this checkbox if you wish to hide this option.
Tribes Setup
The Tribes setup page will show you a list of all the Tribes you have created and their status (whether they are active on the site or inactive). Clicking on the ![]() icon, next to a Tribe, will give you more and slightly different options to what is available for the default Tribes, as seen above:
icon, next to a Tribe, will give you more and slightly different options to what is available for the default Tribes, as seen above:
- Show Tribe - The Tribe summary page, with the completed fields of Name, Description, Status and Rule.
- Edit Tribe Rule - Presents you with the Tribe Rule screen, for easy access of editing its rule (more in-depth walkthrough to Tribe Rules below).
- Delete - Removes the Tribe from your site.
- Show Tribe Members - This will present you with a list of all students in that particular Tribe group, with the fields of University ID, Forename, Surname, Birth Date and Email. If you would like more in-depth details, you can click the blue Generate Report button at the top of the page to download a CSV file of all members' details.
- Download Member Details - Clicking on this icon will automatically download a CSV file of Tribe member details to your device, without having to navigate away from the Tribes page.
- Deactivate (or Activate) Tribe - To make the Tribe active or inactive on your site, depending on its current status.
Creating Tribing Rules
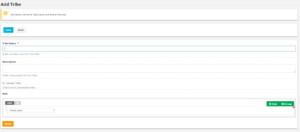
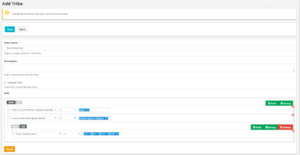
To create new Tribes, click on the blue Add Tribe button at the top of the Tribes page and you will be presented with the screen to the right. To setup your Tribe, you will first need to give it a Tribe Name and Description, to help you identify this particular tribe. Now you can start assigning your tribe rules - rules are used to decide which students go into which Tribe groups. A rule is made up of several parts:
- AND/OR clause - you can decide whether your rules are going to be AND (you need to meet all requirements set here) or OR (you can meet any of the requirements set here).
- Subject Dropdown - Here you can pick what the actual subject of this rule will be (you can choose between the questions you setup in the Tribing Questions Setup area and Study Type).
- in/not in Dropdown - Here you can pick if you want to include or exclude.
- Answer Multi-select - Here you can pick which answers you want to focus on (you can pick more than one answer).
To add more rules, click the green +Rule button and to add more Groups (sets of rules which you can add a different AND/OR clause to, from your original rule) click the green +Group button. At any time you can delete rules by clicking the red delete button next to the particular rule you would like to remove. If you want to completely clear your rules and groups and start again, just hit the orange Reset button at the bottom of the page.
NOTE - Don't forget, to make your Tribe available and live on your site you need to check the Activate Tribe tickbox, which is towards the middle of the page under Description.
