Messages
Messages is a stub, and just part of a wider section on UnionCloud Setup, for the full UnionCloud setup index please check the page here.
As an administrator you can use this section to configure three types of content:
Configure Messages
You can use this section to configure many of the default warnings, information, notifications and help text boxes around the UnionCloud site, so that they are both relevant to your Users, but also written in a tone that matches your Union style. The options cover a range of different areas across your site, split into the categories of:
- Registration
- Registration Help
- SSO Integration
- Payment
- eVoting
- eShop
- Group
- Events
- Course Representative
- Switch/Merge Account
- Restriction Error Messages
- Standard Site Pages
To configure messages, firstly select the area your message fits into from the list above and sift through the messages until you find the one you would like to edit. Clicking on the arrow next to the message will dropdown further information. You will be presented with a Description of what the message is about, a Default Message which is the standard message every UnionCloud site is initially set-up with and a Union Message which is the one you can customise to your own unions needs and which will appear on the front-end of your site. To edit it, click the ![]() button next to Union Message and enter in your custom text.
button next to Union Message and enter in your custom text.
Configure Emails
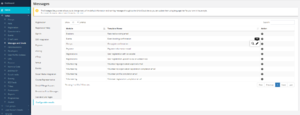
The tab at the very bottom of the Messages page (Configurable Emails), displays all the automatic emails that are sent through UnionCloud, which you are able to configure and edit. There are currently 10 standard emails which you can configure and they are displayed in the first screenshot to the right. Each email has a name, to highlight what the email refers to, and the module which it is related to. By clicking on the ![]() icon next to an email, you have the options to either view
icon next to an email, you have the options to either view ![]() or edit
or edit ![]() the email content.
the email content.
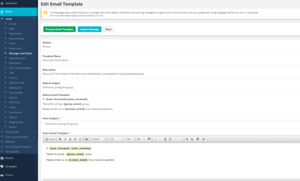
Clicking on the edit icon next to an email will bring up the page to the right. The first few fields provide information about the email, such as:
- Module
- Template Name
- Description
- Default Subject
- Default Email Template
However, the fields Union Subject and Union Email Template allow you to fully customise the content of the emails. Simply enter your text and content into the relevant sections and click Update Message at the top of the page to save your edits. You can also Preview your newly created email, to see how it will appear to receivers, by clicking the Preview Email Template at the top of the page.
You can also make your emails personalised by adding in system field tags, which will automatically grab info from your system to populate text in the email, for example you can pull across a users name into your email. These system field tags can be found at the bottom of the Edit Email Template pages, simply click on the + sign on the orange bar to dropdown relevant system field tags which you can then copy and paste into your email content.


