Difference between revisions of "User Account Details"
(→Delete User Account{{Delete}}) |
|||
| (11 intermediate revisions by 3 users not shown) | |||
| Line 1: | Line 1: | ||
| − | [[File:User | + | [[File:User-account.png|thumb|User Account Details Summary Screen]] |
The first page to load when you enter the 'User Account Details', which gives an overview of all users registered with your particular site, by default this section will show 20 records per page, although there is an option listed to show all records.<br/> | The first page to load when you enter the 'User Account Details', which gives an overview of all users registered with your particular site, by default this section will show 20 records per page, although there is an option listed to show all records.<br/> | ||
This page will list your users along with the following citeria; | This page will list your users along with the following citeria; | ||
| Line 9: | Line 9: | ||
{{url|/administrator/user_account_details}} | {{url|/administrator/user_account_details}} | ||
===View User Account Details{{View}}=== | ===View User Account Details{{View}}=== | ||
| − | [[File:View | + | [[File:View account.png|thumb|View User Account Details Screen]] |
View User Account details displays a summary of the user in question, offering; | View User Account details displays a summary of the user in question, offering; | ||
| Line 61: | Line 61: | ||
====Payment History==== | ====Payment History==== | ||
Payment history has around 30 fields which we wont' list in table form here, but you can find yourselves fairly easily, the reason it contains this many is so that finance staff can find a detailed breakdown of price aroudnd VAT / Shipping / Charges etc. | Payment history has around 30 fields which we wont' list in table form here, but you can find yourselves fairly easily, the reason it contains this many is so that finance staff can find a detailed breakdown of price aroudnd VAT / Shipping / Charges etc. | ||
| − | |||
===Edit User Account Details{{Edit}}=== | ===Edit User Account Details{{Edit}}=== | ||
| − | [[File: | + | [[File:User details.png|thumb|Edit User Account Details Screen]] |
The Edit User Account details screen is similar to the View User Account details screen, although with slightly less options listed, however it gives you access to change a users; | The Edit User Account details screen is similar to the View User Account details screen, although with slightly less options listed, however it gives you access to change a users; | ||
| Line 84: | Line 83: | ||
[[File:Delete User.PNG|thumb|Delete User Account Warning]] | [[File:Delete User.PNG|thumb|Delete User Account Warning]] | ||
| − | The steps to delete a user account are fairly | + | The steps to delete a user account are fairly straightforward. |
*Use the filter{{filter}} tool to identify the user you are looking for | *Use the filter{{filter}} tool to identify the user you are looking for | ||
*Click the Delete{{delete}} icon in the final column, in the same row as that user. | *Click the Delete{{delete}} icon in the final column, in the same row as that user. | ||
*A pop up will appear asking 'Are you sure you want to delete this user' <code>[Ok] [Cancel]</code> | *A pop up will appear asking 'Are you sure you want to delete this user' <code>[Ok] [Cancel]</code> | ||
| − | *Click okay, and that user has been removed. | + | *Click okay, and that user has been removed.<br/> <br/> |
| + | <br/> | ||
| + | <br/> | ||
==Merge User Account Details== | ==Merge User Account Details== | ||
| − | |||
{{url|/administrator/user_account_details/show_merge_users_page}} | {{url|/administrator/user_account_details/show_merge_users_page}} | ||
| + | [[File:Merge-accounts.png|thumb|Merge Account Screen]] | ||
| + | [[File:Merge.png|thumb|Completed Merge Account Screen]] | ||
| + | [[File:Merge Account Confirmation.PNG|thumb|Merge Account Confirmation Message]] | ||
| − | + | ===How to=== | |
| − | + | *Click on the Merge User Account Details section, beneath the User Account Details tab. | |
| + | *Search for a user, in the '''first''' 'User email' box, as you type a drop down menu will suggest options, click on the account you mean to choose. | ||
| + | :*At this point the page will briefly refresh, and return some information about the first account, giving you Name, and DOB, so you can confirm the user. | ||
| + | *Search for a user, in the '''second''' 'User email' box, as you type a drop down menu will suggest options, click on the account you mean to choose. | ||
| + | :*As with the previous box, the page will now refresh, and load details of the account. | ||
| + | *Decide which account you want to make primary, and use the '[Mark as Primary]' button below it, which will then become highlighted. | ||
| + | *Simply press the 'Merge Users' button. | ||
| + | |||
| + | You will then be prompted to confirm whether you wish to confirm this merge. | ||
| + | Finally you will be taken to a screen summarising the new account details, the email address of the second account will also be listed in the alternate email space. | ||
| + | |||
| + | ===Notes About Account Merging=== | ||
| + | On this section you can merge users if they have two user accounts, for example, this could happen when a student has not received their university ID they are able to still register the student union website with their personal credentials and when the student is provided with their university credentials, later on, you are able to search for the user via name/email and merge both accounts into one. | ||
Latest revision as of 13:22, 27 July 2018
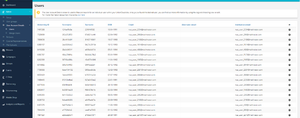
The first page to load when you enter the 'User Account Details', which gives an overview of all users registered with your particular site, by default this section will show 20 records per page, although there is an option listed to show all records.
This page will list your users along with the following citeria;
UniversityID (If applicable), Forename, Surname, Date of Birth, Email, Alternate Email, the final column showing the View(![]() ), Edit(
), Edit(![]() ), Delete(
), Delete(![]() ), and Resend Fast Track Email
), and Resend Fast Track Email![]() buttons, we will cover below.
buttons, we will cover below.
The Second section listed below the 'User Account Details' menu, is 'Merge User Account Details' screen. This would normally be used for students who registered before they came to college / university with a personal email address but who will automatically have a 'Student' account created for them after registration.
Contents
List User Details
You can find this page on your own site at url: <yoursite>/administrator/user_account_details
View User Account Details
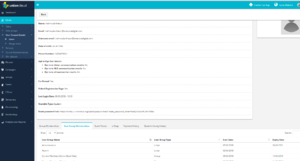
View User Account details displays a summary of the user in question, offering;
- Name
- Profile Picture
- User email
- Date of birth
- Phone Number
- Opt out in/out Details
- Opt out of Union communication emails: [Yes/No]
- Opt out of NUS communication emails: [Yes/No]
- Opt out of all commercial emails: [Yes/No]
- Confirmed [Yes/No]
- Visited Registration Page [Yes/No]
- Last Login Date
- Userable Type
Below it then offers 5 Tabs showing more of the users history, listed in table form like so;
Group Memberships
This is any membership related to a group (so any Clubs / Societies)
| Group Name | Membership Type | Status | Block/Unblock |
|---|---|---|---|
| Name of Club / Society | Type of membership purchased | approved/expired/pending | Option to block current members |
User Group Memberships
This is any membership related to a usergroup (these are the ones that control permissions, they can have one of several permission sets assigned to them, or none at all).
| User Group Name | User Group Type | Start Date | Expiry Date |
|---|---|---|---|
| Name of permission group | Type of user group (Group, Event, Union, other) | Date user was added | Date user will be removed from permissions group |
Event Tickets
This is any event a user has attended since registered, and any future tickets that have been purchased.
| Event Name | Event Start Date | Event End Date | Ticket Purchase Date | Ticket Number | Redemption |
|---|---|---|---|---|---|
| Name of Event | DD-MM-YYYY | DD-MM-YYYY | Date Purchased (DD-MM-YYYY) | 6 Digit Alphanumeric code | Yes/No |
e-Shop
This is any order that a user has placed through the online eShop
| Order ID | Date | Order Amount(£) | Order Status |
|---|---|---|---|
| Order ID, beginning characters unique to union | DD-MM-YYYY | Order Value in GBP (£) Sterling | Dispatched / Awaiting Dispatch / Collect In Person / Intl. etc |
Payment History
Payment history has around 30 fields which we wont' list in table form here, but you can find yourselves fairly easily, the reason it contains this many is so that finance staff can find a detailed breakdown of price aroudnd VAT / Shipping / Charges etc.
Edit User Account Details
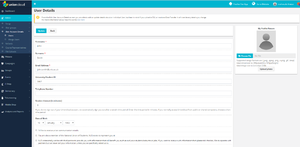
The Edit User Account details screen is similar to the View User Account details screen, although with slightly less options listed, however it gives you access to change a users;
- Forename
- Surname
- Profile Picture
- Email address
- Telephone Number
- Session Timeout (in minutes)
- Date of Birth
- Opt in/out settings
- [Checkbox] To opt out of union communication emails
- [Checkbox] To opt out of NUS Emails
- [Checkbox] To opt out of Third Party Emails
![]() Note: If your union has setup registration questions (See Setup) then you can change these options here also.
Note: If your union has setup registration questions (See Setup) then you can change these options here also.
Delete User Account
The steps to delete a user account are fairly straightforward.
- Use the filter
 tool to identify the user you are looking for
 - Click the Delete
 icon in the final column, in the same row as that user.
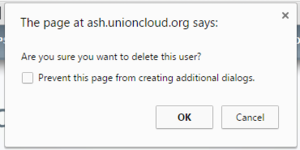
 - A pop up will appear asking 'Are you sure you want to delete this user'
[Ok] [Cancel] - Click okay, and that user has been removed.
Merge User Account Details
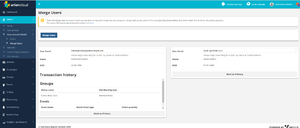
You can find this page on your own site at url: <yoursite>/administrator/user_account_details/show_merge_users_page
How to
- Click on the Merge User Account Details section, beneath the User Account Details tab.
- Search for a user, in the first 'User email' box, as you type a drop down menu will suggest options, click on the account you mean to choose.
- At this point the page will briefly refresh, and return some information about the first account, giving you Name, and DOB, so you can confirm the user.
- Search for a user, in the second 'User email' box, as you type a drop down menu will suggest options, click on the account you mean to choose.
- As with the previous box, the page will now refresh, and load details of the account.
- Decide which account you want to make primary, and use the '[Mark as Primary]' button below it, which will then become highlighted.
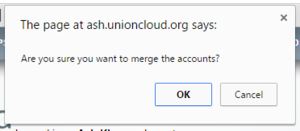
- Simply press the 'Merge Users' button.
You will then be prompted to confirm whether you wish to confirm this merge. Finally you will be taken to a screen summarising the new account details, the email address of the second account will also be listed in the alternate email space.
Notes About Account Merging
On this section you can merge users if they have two user accounts, for example, this could happen when a student has not received their university ID they are able to still register the student union website with their personal credentials and when the student is provided with their university credentials, later on, you are able to search for the user via name/email and merge both accounts into one.
